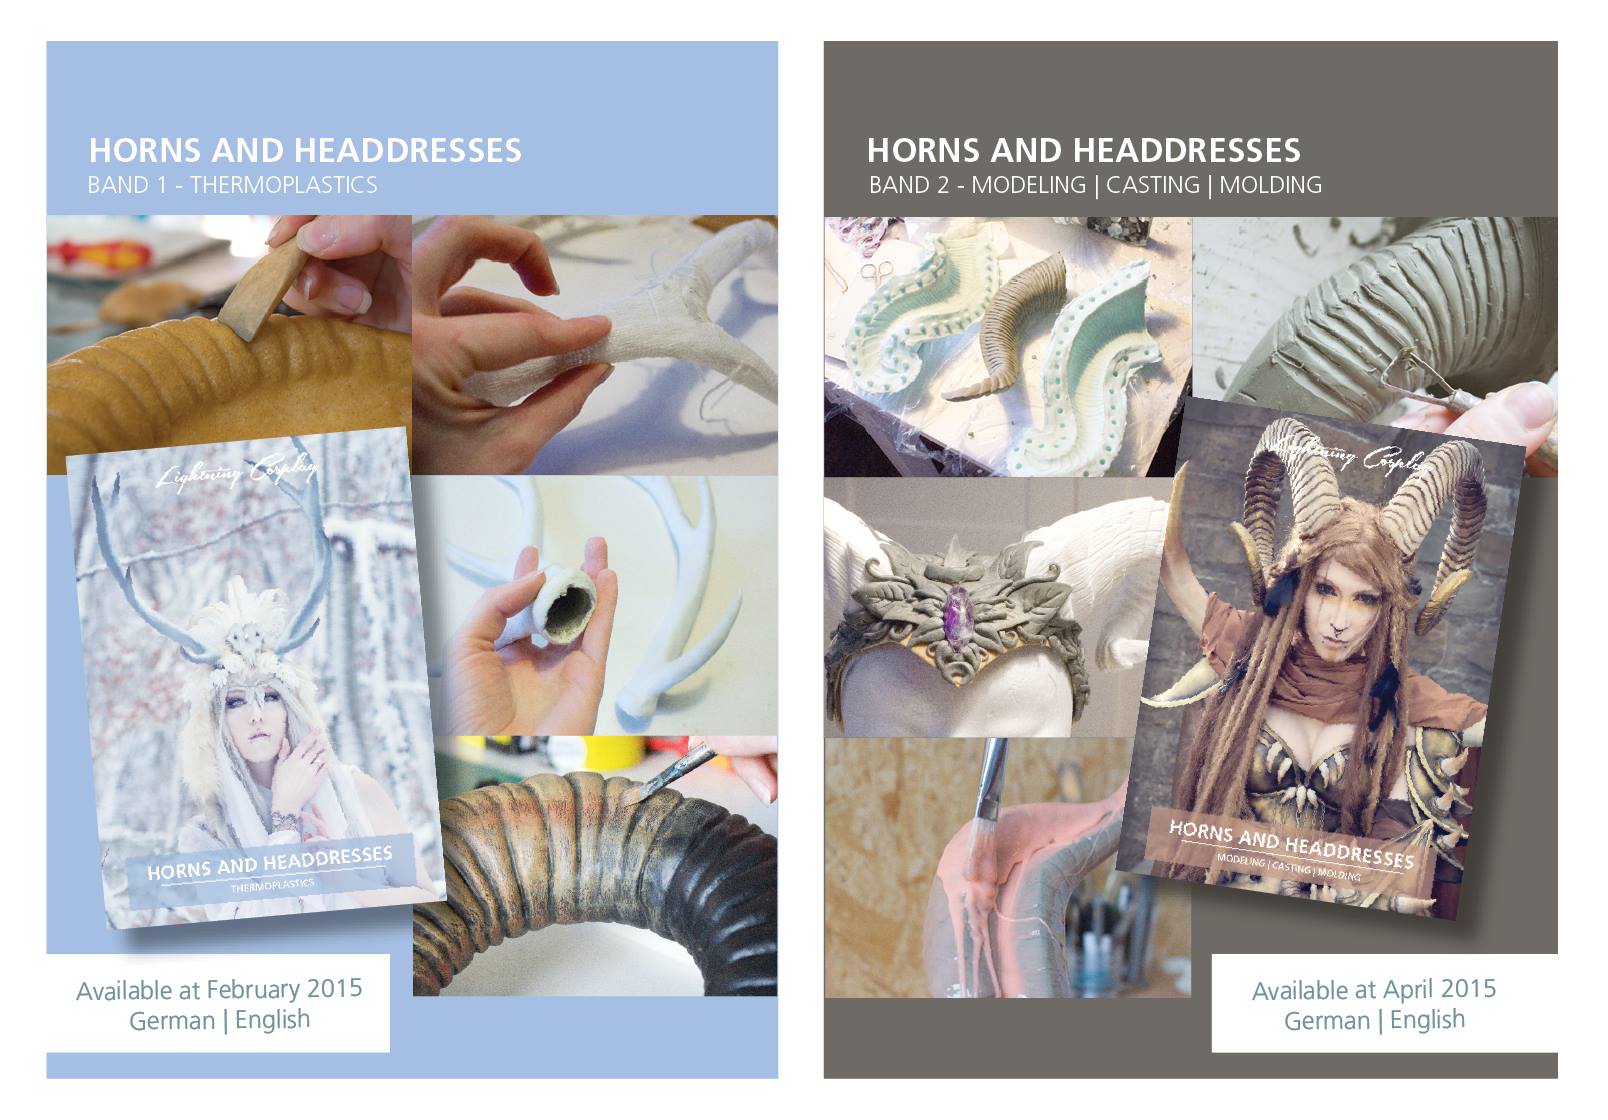
After feeling very inspired by Laura Jansen’s (Lightning Cosplay) beautiful voodoo witch cosplay, I set about trying to make my own! Thankfully for me Laura has recently released her very first tutorial book ‘Horns and Headdresses’ which covers how to work with materials such as foam, Worbla’s Finest Art (which most people know as Worbla) and Kobracast. This book is definitely a good starting point for people who know and have a sound understanding of how these materials work and are looking to develop their skills further. I won’t stray into too much detail about how to make the headdress as it’s all explained clearly in Laura’s tutorial book and I’d highly recommend purchasing it.
The book is very thorough and gives many good examples of different styles of headdresses so that the reader can create their own. There was even a tutorial of the voodoo headdress that I so greatly admired (woo hoo!). It was so clearly explained that I knew exactly what I needed to and what materials I needed and I didn’t need to stray much further from eBay to get everything that I required. The trickiest thing to get right was Styrofoam! eBay doesn’t have a lot of choice sadly, the foam isn’t in the greatest condition and is very expensive so I turned to 4D model shop which is very reasonably priced and has a good range of foam. It took me a couple of attempts to get the right size though! There was also the issue with cutting the Styrofoam, I invested in a good table top hot wire cutter as the prices for Styrofoam cutters were insanely expensive. The table top hot wire cutter is very easy to use and cuts smoothly through the foam with ease.
After cutting my horns to the template that I’d made, I then carved them into shape with the craft knife. It’s incredibly important to have a sharp knife as foam dulls a blade incredibly quickly, so I’d recommend purchasing a hobby knife where you can easily change the blade, which you will need to do very often if you want smooth and easy cuts. Be very careful too though! I gained quite a few cuts and scrapes to my hands at this stage, whoops! Many cuts later I had the shape that I wanted and was ready to begin sanding. Make sure when you move onto the sanding stage that you choose a very fine grit sanding paper, you don’t want to make your wrist ache any more than it will so you want to make it as easy as possible!
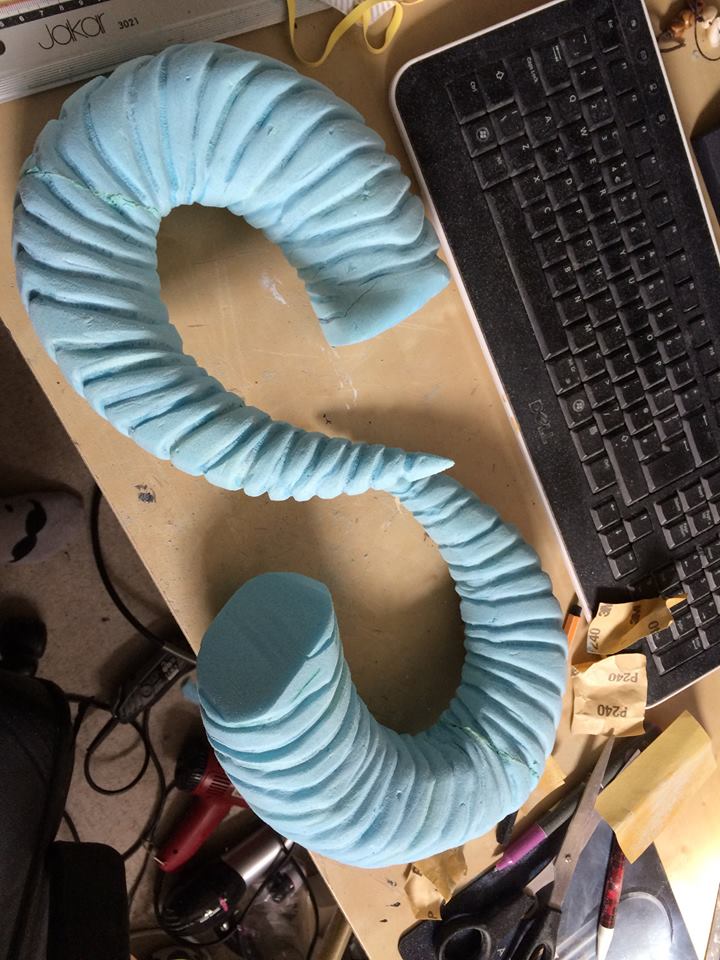
Then ugh, I remember this next part oh too well. Because it took sooooo long and it was incredibly tedious. I’m talking about the part that’s going to make your horns look like horns! Creating all the individual grooves and lines for detail took a very long time as it involved drawing all the grooves, carving them with the dremel and then sanding each individual groove. The sanding took the longest but is definitely a very crucial step as without it the grooves would be messy, harsh and dented lines.
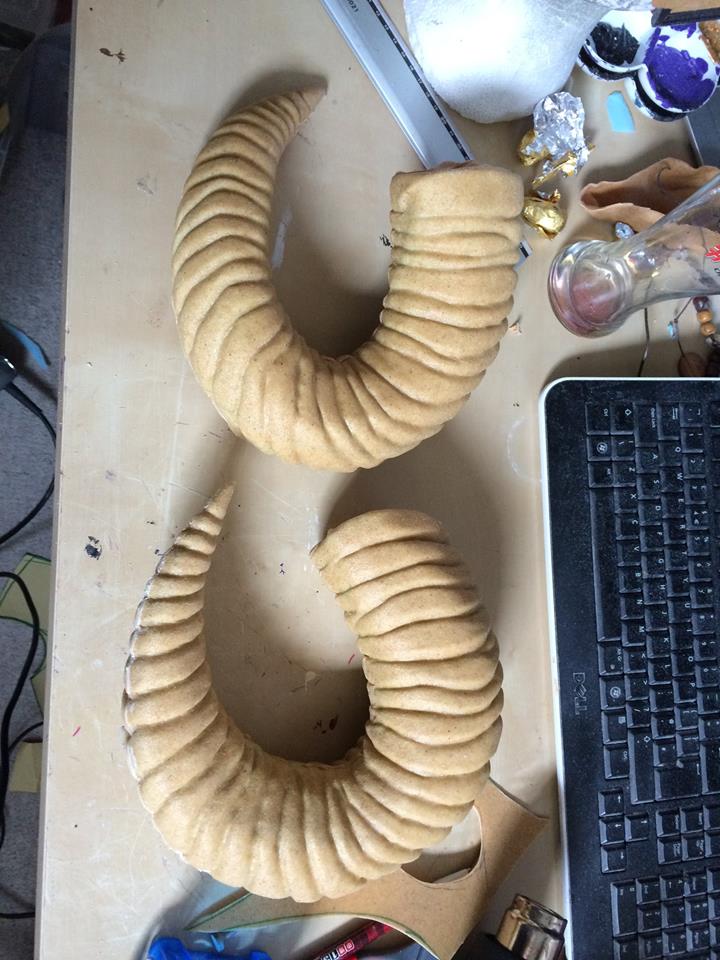
The recurring theme of this build is patience, you do need a lot of it to complete the headdress and this project definitely did test mine many times. Particularly when it came to sanding and then covering them in Worbla, which took a surprisingly long time (around 2 hours in fact) as you have to carefully layer the Worbla and push it gently in-between each groove which means you have to heat up the Worbla a bit at a time. Patience is definitely worth it here though if you want to show off your hard work in creating all that detail!
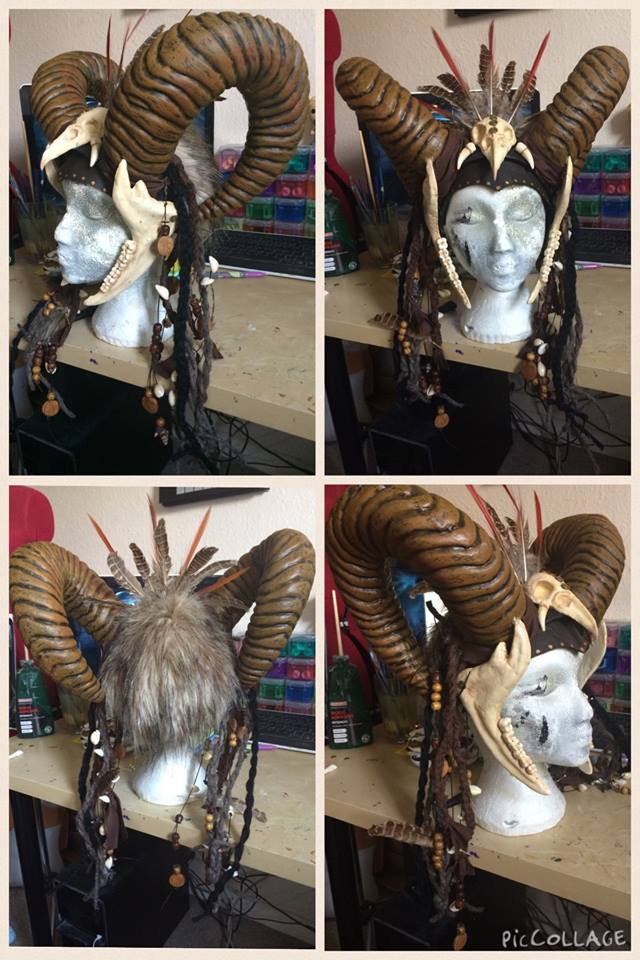
After more sanding, priming and the painting you get to do the exciting part, decorating! I loved sourcing out materials like shells, little skull beads and feathers to complete the overall look. And of course left over Worbla scraps to create the skulls and bones! Although by far my favourite new material that I discovered whilst completing this project was definitely the foam clay which is what I used to create the jawbone pieces. It is incredibly lightweight and can be covered in another material such as paper mache if you want to hide the dimply surface. It also smells a lot like a very posh hand cream, although I’ve since been told that that’s just me!
I really enjoyed the project and it definitely pushed me to try new things and gain some new skills. It was worth the effort and I eagerly await using these skills in another project. Laura also has a new tutorial book coming out soon on making horns by sculpting and casting, bring on the next challenge! You can buy Laura’s tutorial books here: http://www.lightningcosplay.com/