

A continued series from Charlotte Woolrych Photography where she shares how photography skills and knowledge. This month she goes through the setting and modes on a camera and explains what each one means.
Everyone can take stunning photos, even when the camera is on automatic mode. The tricky part comes when trying to recreate the lighting in your favourite photos! On automatic mode, it is not always possible, so the best thing to do is to start experimenting with the other modes your camera offers you, so you can recreate lighting, and play with lighting to your heart’s content.
Manual Mode (M)
Manual mode on your camera can be broken down into 3 sections. You control;
- a) the speed at the image is taken. (shutter speed)
- b) the basic light level of the image (ISO)
- c) how large or shallow the depth of field is (aperture). These three sections are balanced against each other to allow you to have 100% control over how your photos look.
Let’s break it down visually.
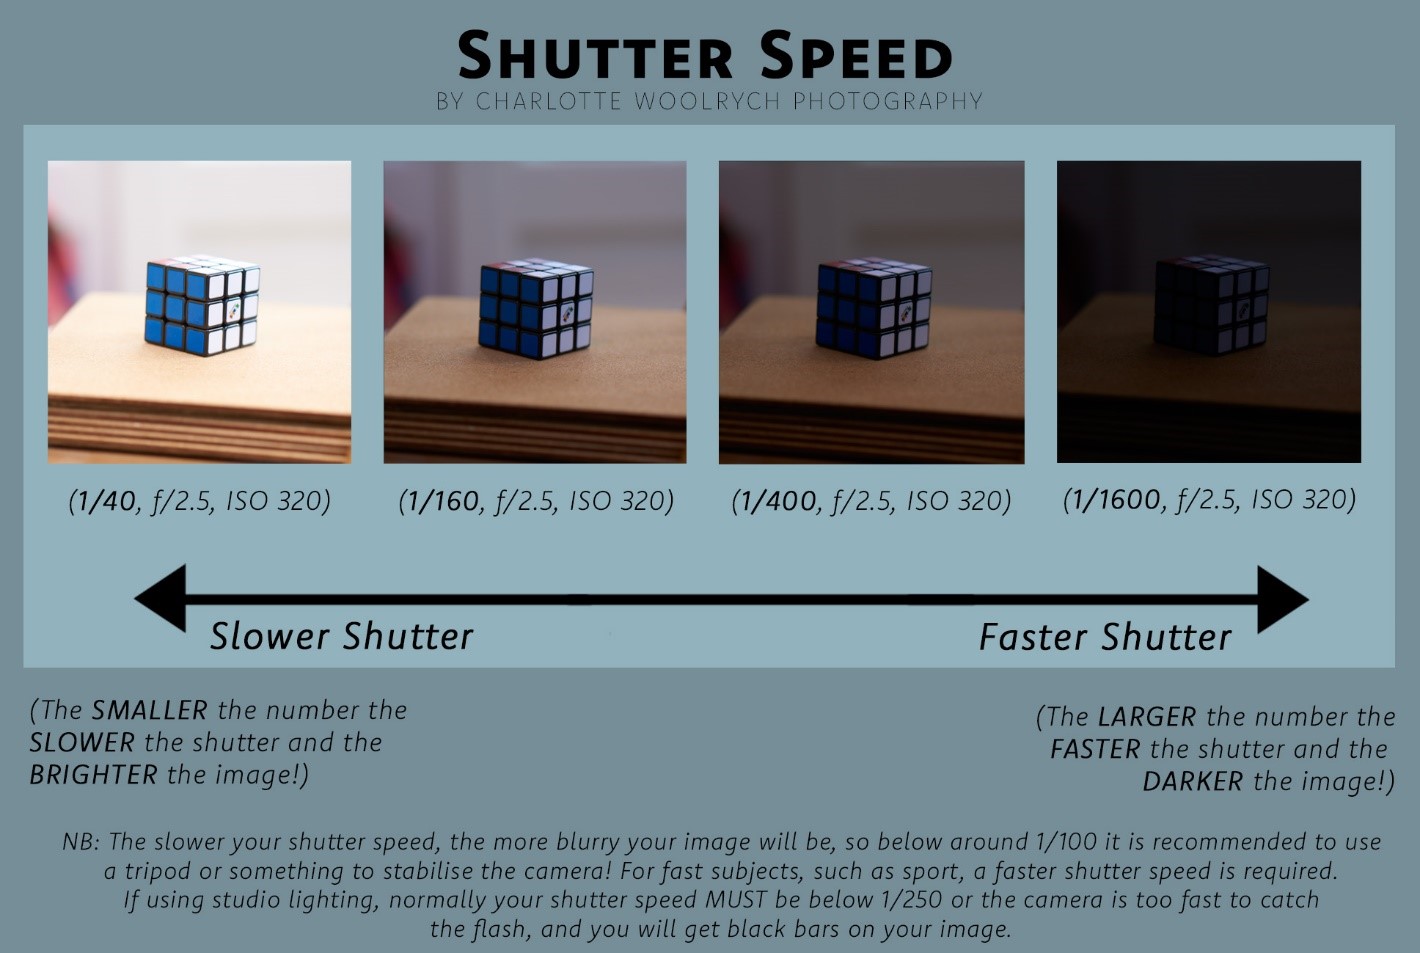
a) Shutter Speed. The first thing you will notice when playing with the shutter speed on your camera is that the faster the speed, the darker your image is. This is because there is less time for light to enter and be read by the camera. A slower shutter speed allows more light into the camera, and therefore your images are lighter BUT the longer you shutter is open, the more blurry your images can become.
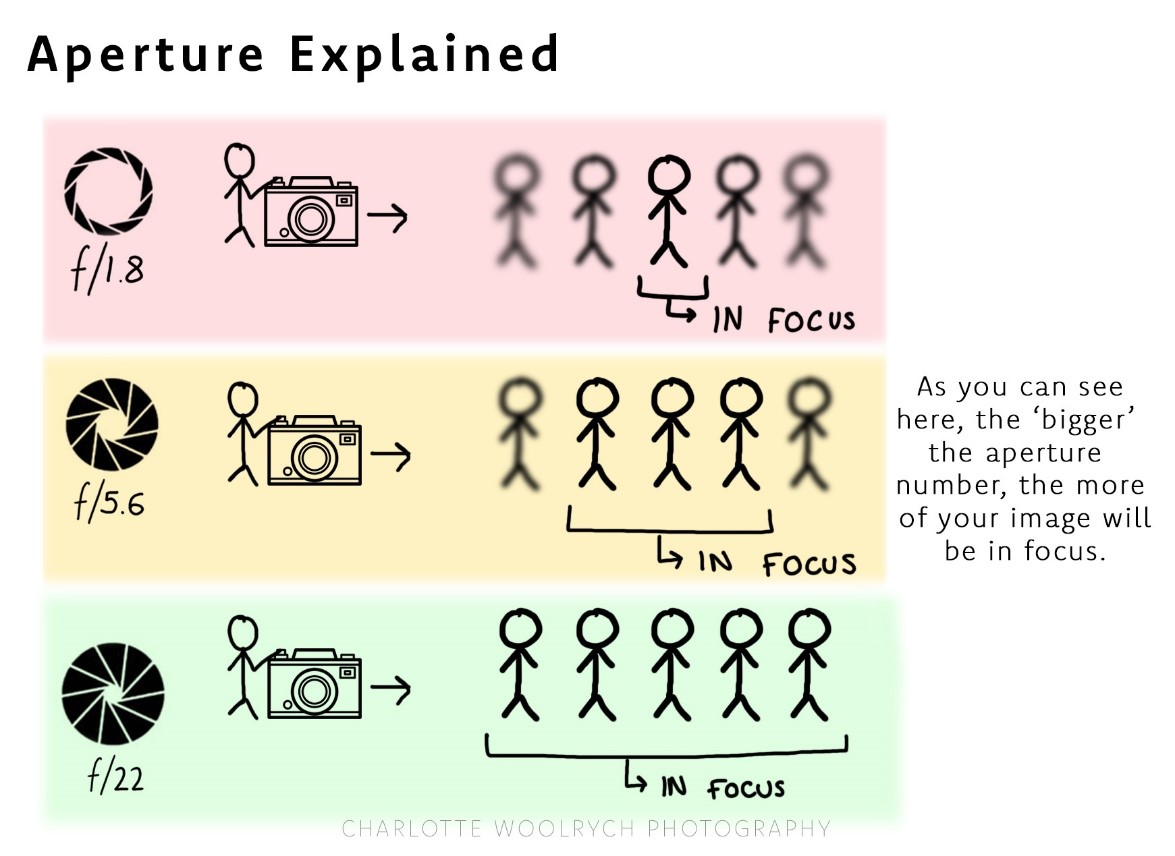
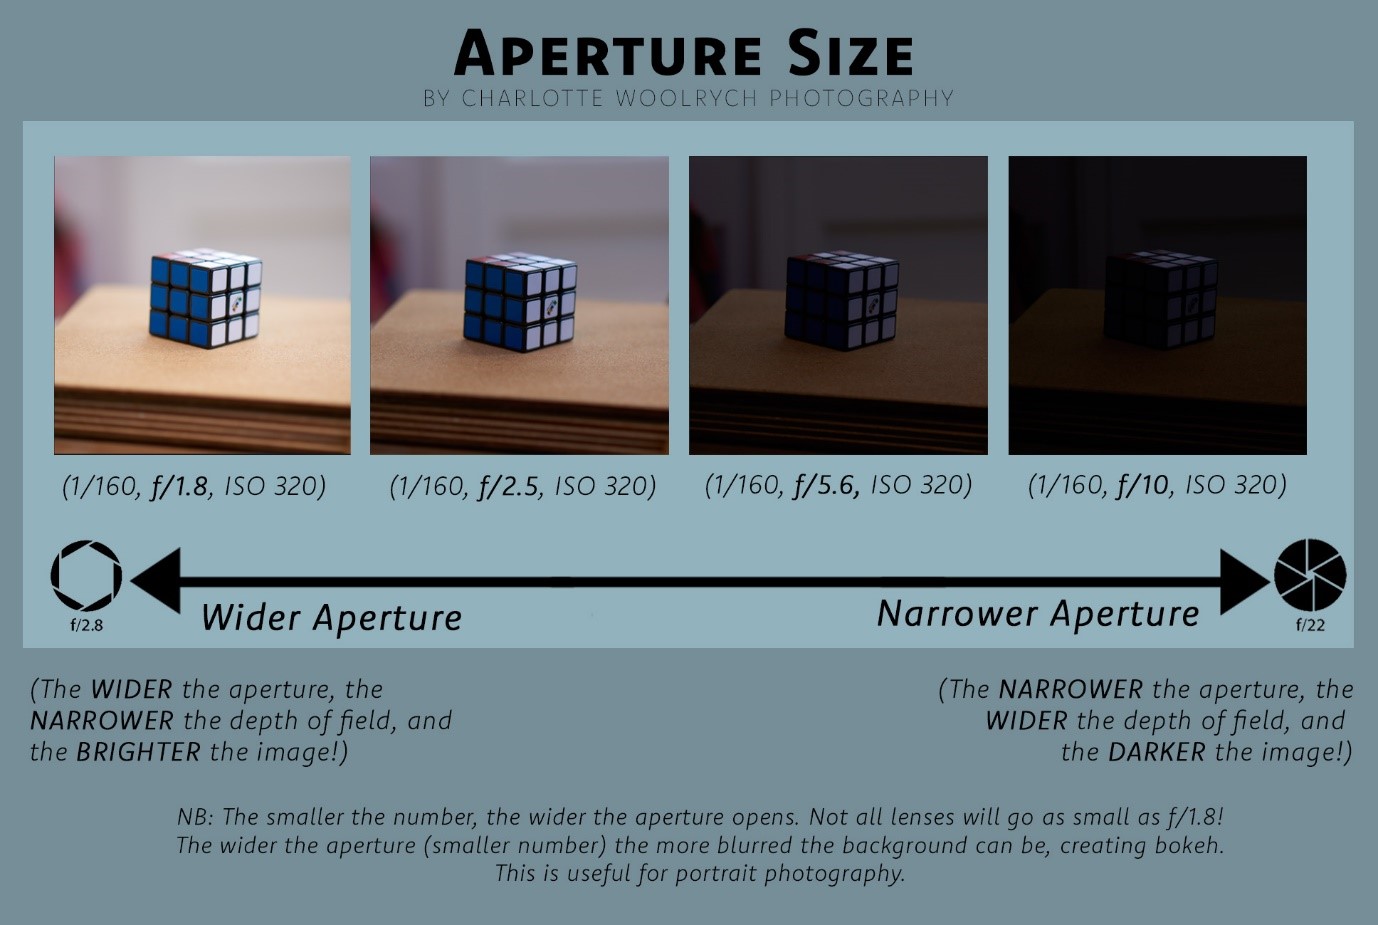
b) Aperture. Aperture controls your depth of field, e.g. how much of your image is in focus, and how much is blurred. It is noted on your camera as f/ and is also known as the ‘f-stop’. For me, this is most important in portraiture as it is what I use to create the beautifully blurred background, that allows me to separate my model from any directions.
The smaller the number of the f-stop the more open your camera’s aperture is. This does two things, allows more light to enter the lens, and also makes the depth of field very shallow.
A larger f-stop allows more of the image to be in focus but also makes the image darker.
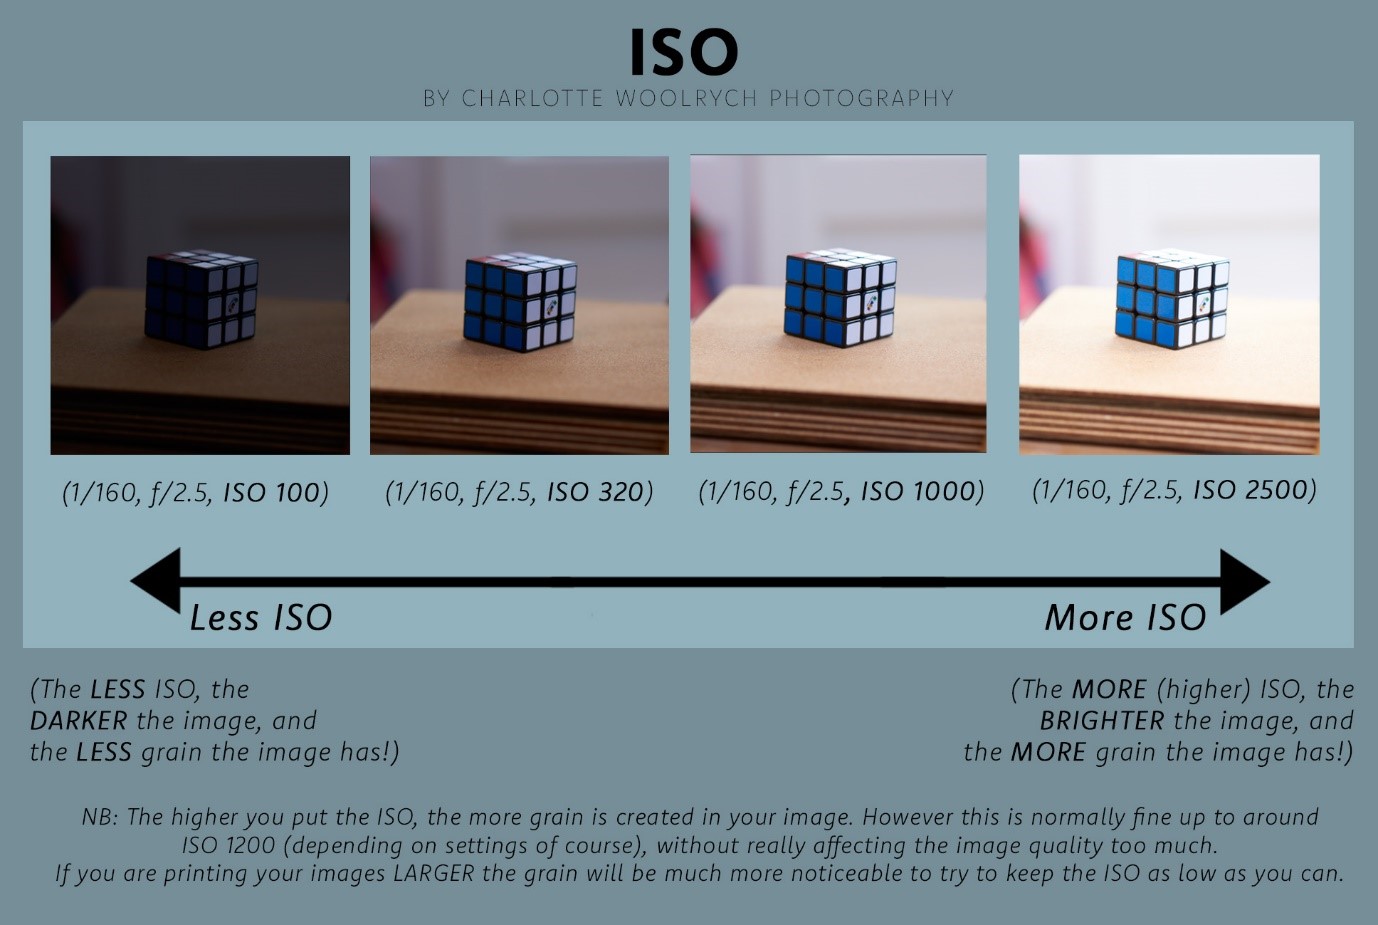
c) The ISO. ISO was originally used to reference the sensitivity of film for film cameras. In digital cameras, I use it as the final adjustment for photos, if I want to make my images lighter or darker, and I do not want to change my other settings. Simply, the higher the number of your ISO, the lighter your image will become. The only downside is if you raise the ISO too far, you can start to see the grain in your photos (they look dusty), as this is the effect that too much ISO can have. Normally I can get away with raising the ISO to about 1000 or slightly more without seeing too much grain in my photos, but it’s definitely something to bear in mind!
Some Speedy Practical Advice:
- Sports Photos: Your priority is not blurring the players, and therefore you should set you shutter speed as your priority, and adjust the lighting using the aperture (note a shallower depth of field will make focusing harder) and the ISO.
- Portrait Photography: Your priority here is often aperture, personally I prefer a shallow depth of field to create a lovely creamy bokeh background, so I use my shutter speed to control the lighting.
- Family/Group Photos: You will need to have a wider depth of field, to make sure that no-one’s face gets blurred out. Similarly, I would use shutter speed then ISO to fix the lighting here.
Other Camera Modes:
- M – Personally I prefer to use manual mode as I find it the easiest when I am making all the camera choices. However you do have other options when it comes to your camera!
- S – Shutter Priority mode. In this mode, you select the shutter speed appropriate for your subject, and the camera works out an appropriate aperture and ISO for you.
- A – Aperture Priority mode. In this mode, you select the aperture (depth of field) appropriate for your subject, and the camera works out an appropriate shutter speed and ISO for you.
- P – (On Nikon) Programmed Auto. In this mode the camera selects an appropriate aperture and shutter speed for you, but you can scroll through and choose from a few combinations that it offers you! I used this as my mid-point between fully automatic and manual mode, as the camera is better at reading light in this mode.
I hope this helps as an easy visual introduction into what each of the settings on your camera does. Whilst it can get more technical than this, to learn manual mode all it takes is practice balancing the three settings against each other. Enjoy practising and having fun with lighting!
Happy creating


